Posts filed under ‘Step-By-Step Guide’
Guide to Enable WPA2-PSK Support on Dlink DWL-G630 Wireless Card
Hi Friends,
If you are using DWL-G630 Wireless Card from Dlink, then you might have noted that it does not support WPA2-PSK Encryption.
I am talking of particular DWL-G630 Rev. D Card which are sold out here in India.
The driver that came along with the contents are v4.10 released in 2005 which are pretty old.
A quick search around google to find out the latest drivers from Dlink seems pretty painful task as there is no proper information available on Dlink Official Website.
Hence, i decided to crack this nut…as i did not want to lower my Wireless Router’s security encryption anything below WPA2-PSK just because of lame non-availability of driver!
First, in order to get latest drivers from Dlink; finally landed me to the Dlink’s Global US FTP Site, where dozens of driver zips are available.
You have to manually download & have a look if it will work for your card or not. Dont go for the filename to determine the driver model as it might support many cross cards.
You need to check the driver INF file post download to exactly determine which cards are supported.
DLink’s Global FTP Driver Site: ftp://ftp.dlink.com/Wireless/
Now, after downloading couple of files, the only latest driver post v4.10 was v4.1.2.725 released on 06/27/2007.
ftp://ftp.dlink.com/Wireless/dwlG630_revE/Drivers/dwlG630_revE_drivers_514.zip
If you install these drivers from Dlink, don’t expect it to support WPA2-PSK Encryption!!
Thus, the search for WPA2-PSK Support continued!!
Lets have a quick introduction over WPA2-PSK & its support on Microsoft Platform:
A very good article for Microsoft support can be read at:
http://www.microsoft.com/windowsxp/using/security/expert/bowman_wirelesssecurity.mspx
Note that you need XP Service Pack2 or the specific update in order to make sure that your OS Support’s WPA2-PSK Encryption.
If you are already on Windows XP Service Pack3…you are on track 😉
Two good articles to go over WPA2-PSK Encryption details:
http://technet.microsoft.com/en-us/library/bb878054.aspx
http://en.wikipedia.org/wiki/Wi-Fi_Protected_Access
So now to move ahead with our WPA2-PSK Support quest…i went around few articles which mentioned that the chipset used in DWL-G630 is manufactured by Atheros!
A quick search around points that Dlink DWL-G630 has AR5005 chipset. Now the catch out here is Atheros drivers support WPA2-PSK Encryption.
So finally after digging on the google, i got the below Atheros AR5005X chipset driver compatible for DWL-G630!
WPA2-PSK Supporting DWL-G630 Driver for Windows XP: http://www.filefactory.com/file/a1fcbea/n/atheros_ar5xxx_770406_xp.zip
Once i downloaded this & did an update driver, my Wireless card connected instantly to my Wireless Router Access Point!
If you are looking to configure this Card on Linux, then below is a good page on Ubuntu Forums for the same:
http://ubuntuforums.org/archive/index.php/t-176750.html
Finally a day along wait and precious R&D came to some useful conclusion.
I am not sure why DLink is not releasing an updated driver which would support the WPA2-PSK Encryption, but as long as we have a workaround we should not be complaining 😉
I hope this documentation seals up the issue for anyone else as i did not find a conclusive dedicated document on the internet for this issue.
Go Wireless >>>>>>>>>
Keywords: Wireless, Wireless NIC, Wireless Card, DWL-G630 Rev D, Dlink, WPA2, WPA, WPA2-PSK, Atheros 5005X, Atheros 5xxx, Driver, Wireless Driver, etc
Connecting Nokia 6600 PC Suite v1.1.0 with Bluesoleil Bluetooth Dongle
Connecting my Nokia 6600 PC Suite with a Bluesoleil Dongle was a big headache!
Earlier Bluesoleil version upto v1.4 worked fine with PC Suite v1.0 for Nokia 6600…but
ever since the PC Suite v1.1 for Nokia 6600 has been released & newer versions of
Bluesoleil coming up, connecting the both is a big problem!
I somehow though managed to connect it, so here are the steps for the same..
1)First of all you need the Bluesoleil Driver (http://www.ivtcorporation.com).
Please ensure that your Dongle supports Bluesoleil drivers. Not all dongles are supporting
the same.
I used the Bluesoleil driver Version: 2.1.3.0 Release: 060429 (Check Image Below)

2)After the driver installation, install the Nokia 6600 PC Suite, version 1.1.0
Download from: http://www.nokia-asia.com/nokia/0,,59279,00.html
3)PC Suite successfully installed, now diverts us to the mRouter Connection Settings…
There are various COM port options to be selected, and after many trials i found the
correct settings. Check the attached picture to select exactly what is required in your
mRouter Connection Setting Box!

4)Restart your PC
5)Insert your Bluetooth Dongle in USB & start Bluesoleil
6)Start bluetooth on your Nokia 6600 & press F5 on Bluesoleil window. This would search
your Nokia 6600 & list it.
7)Right Click the device listed & select PAIR DEVICE. Feed in any random number, say 123 &
when prompted on your mobile feed the same so that both the devices are paired to each
other!
8)Now double click your Nokia Mobile Device, & the services supported by it would be
highlighted!

9)Double Click the COM Port icon & it would ask, do you always want the service at COM port
automatically activated for this device? Say YES!
Now, it would prompt your mobile phone, saying the PC is requesting for connection, say
YES!
10)Once this is done, wait for few minutes, the mRouter would start blinking & say
connected.
11)Open the Nokia 6600 PC Suite, & it would say new phone found! Bingo!!
Thats it, take backups, restore or sync your mobile with PC Suite!
If you face any problems in this, just ask!
Enjoy the power of Nokia 6600 V1.1.0 PC Suite & Bluesoleil Bluetooth Dongles!!
Keywords: blue tooth,bluesoleil,bluesoleil 2.3,bluesoleil bluetooth,bluetooth,bluetooth dongle,cell phone,cell phones,cellphones,cellular,cellular phones,computer,free pc suite,gsm phones,ivt,ivt bluesoleil,mobile,mobile phone,pc bluetooth,pc connection,pc mobile,pc phone,pc phones,pc suite,pc suite 6600,pc suite bluetooth,pc suite software,phones,smartphone,software suite,usb dongle,wireless
Downloading Videos from YouTube, Google, Yahoo & Many Other Sites..
Ever since YouTube shot to fame…many online video sites have come up!
People love to watch Videos Online…but few of them are so nice, that a copy on your HardDisk is a Must!
To facilitate the downloads…a superb plugin has been developed by “Javi Moya” called the Video Downloader!
Its a extension based for FIREFOX Browser…If you dont have firefox, just click the Download Button on the sidebar on page!
Next Download the extension from Mozilla’s Official Website: VideoDownloader Extension
Installing the extension is simple & automatically done in Firefox!
Another online utility that can be used from right here allows you to get the download URL of your fav video..
Just suffix the URL of video, e.g.: http://www.youtube.com/watch?v=4cSRpu7bI04 to link below…& paste it in your browser address bar to get the download link instantly!
http://videodownloader.net/get/?url=
E.g.http://videodownloader.net/get/?url=http://www.youtube.com/watch?v=4cSRpu7bI04
Got the video you want??? But you want to play it back on the desktop!!
Get the FREE FLV Player which enables you to play the FLV format files from Youtube & various other sites…
Download: FLV Player
You got the Video…you played it back on your computer! But you want it on your iPOD too…
Yes its possible with the Replay Converter: Replay Converter
Various Video download sites covered by this extension are:
Angry Alien, Blennus, Blip.tv, Break.com, Dailymotion, Double Agent, eVideoShare, Free Video Blog, Google Video, Grinvi, iFilm, Keiichi Anime Forever, Metacafe, MySpace, MySpace Video Code, Putfile, Totally Crap, vidiLife, vSocial, AnimeEpisodes.Net, Badjojo, Blastro, Bofunk, Bolt, Castpost, CollegeHumor, Current TV, Dachix, Danerd, DailySixer.com, DevilDucky, Double Agent, EVTV1, FindVideos, Hiphopdeal, Kontraband, Lulu TV, Midis.biz, Music.com, MusicVideoCodes.info, Newgrounds, NothingToxic, PcPlanets, Pixparty, PlsThx, Revver, Sharkle, SmitHappens, StreetFire, That Video Site, VideoCodes4U, VideoCodesWorld, VideoCodeZone, Vimeo, Yikers YouTube and ZippyVideos.
Sources:
VideoDownloader Website: VideoDownloader
Google
Keywords: capture youtube video,download a video from youtube,download a youtube video,download from youtube,download video from you tube,download video from youtube,download videos,download you tube video,download youtube video,downloading video from youtube,downloading youtube,downloading youtube video,free videos,how to download a youtube video,how to download video from youtube,,how to download youtube video,how to save a youtube video,how to save youtube video,online videos,save a youtube video,save video from youtube,save youtube,save youtube video,saving youtube video,utube,video youtube com,videos,you tube,you tube video,you tube video downloader,youtube,youtube music video,youtube video,youtube video downloader,youtube video grabber,youtube videos
Ubuntu 5.10 (Breezy Badger) Step-by-step Guide for Dual Boot Installation
I am installing Ubuntu 5.10 Breezy BadgerSo lets begin with insertion of Install CD in Cd-drive and booting from
the CD-Rom…
1)Once the CD Autoboots, you would get a Ubuntu Logo Screen with ‘boot’ prompt…
2)Press ENTER to begin the installation
Note: Entire Installation is in TEXT-Based Mode, no GUI-based is available.
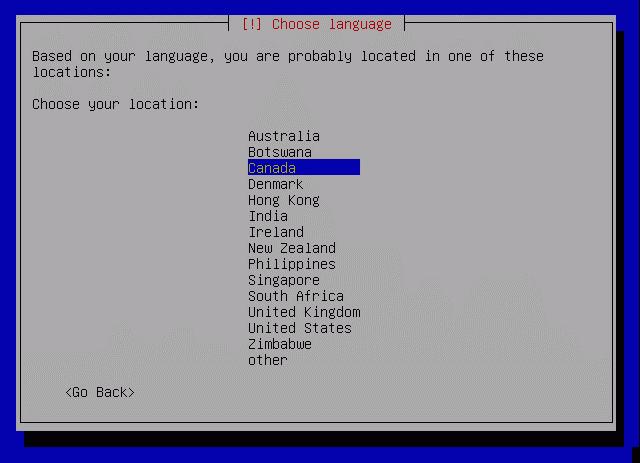
3)It would prompt for ‘Choose Language’, select English
4)Now it prompts for ‘Choose Location’, select as appropriate5)Keyboard Layout selection confirmation dialog appears…confirm and press ENTER
6)Now various hardware detection and IDE,Ports configuration would take place…so sit back and relax
7)Various Modules and Softwares would be Unpacked next…
8)Network configuration box appears.. It wud try auto-detect via DHCP or if it fails, it would ask whether you want to configure ManuallyYou can select as appropriate…
Note: If you use DSL or PPPoe type Internet Connection, do not configure your internet manually, just skip to next step
9)Now it prompts for the Hostname… by default it says ‘Ubuntu’, you can configure it to anything…its just like Computer Name while Windows Installation
10)Now main part comes is Partitioning of Disks…
Now, select your appropriate HDD(in-case of multiple hdd’s)..
Mostly it would be something like
Erase entire disk: IDE1 master(hda) – 37GB, etc..
11)Next screen it would show you two partitions made, one of ‘ext3’ filesystem and other a ‘SWAP’ partitionIf you selected the proper HDD in earlier step… select YES for ‘Write Changes to the disk’
12)Now installation of Base System would begin so sit back and enjoy..
13)Timezone configuration box prompts after above step..select your Timezone and confirm
14)Now user setup comes up… Enter your full name for the User, in next screen select a short username for logon (This username is what you would use to login) and then the password bviously!
15)Now, the Boot Loader configuration comes… If it shows your already installed Windows Installation, like Windows XP Professional.. its safe to install the Boot Loader on MBR without any problems…
16)Now, it would prompt for a REBOOT… upon reboot..enter your Bios and put First Boot Priority to Harddisk i.e. ur Windows one
17)Now, it would show you Loading GRUB 1.5..and then list various OS…with 4 entries for ubuntu and under Other Operating Systems, it would list Windows XP Professional
18)Boot your Ubuntu, the first in the listit would complete the remaining installation
19)Now X-Server Configuration appears.. select the various resolutions your monitor supports and confirm
20)Thats it.. your installation is completed and your Ubuntu Logon screen appears.. Put in your ‘username’ used in step14 and password to get inside.
Now, after installation you can reboot and use your Windows XP by selecting it from the Boot Menu
If you want to configure Windows XP as the default OS for booting each time, boot into Ubuntu Navigate to My Computer>Filesystem>boot>grub>menu.lst
Open the menu.lst file in text editor..it wud be having something like this at start:
# Generated by grubconf-0.5.1
default=1
timeout=10
Change the default=1 to default=4
Thats it…now your XP is the default booting system next time onwards.
Enjoy your Ubuntu..and do let me know if you face problems..
Few Screenshots…


A comprehensive list of screenshots while installation can be checked at: http://shots.osdir.com/slideshows/slideshow.php?release=342&slide=1
Keywords: breezy badger,edubuntu,free,installing ubuntu,linux,linux operating system,linux os,linux support,open source,operating system,software,ubuntu,ubuntu desktop,ubuntu download,ubuntu how to,,ubuntu install,ubuntu laptop,ubuntu linux,ubuntu screenshots,ubuntu server,xubuntu
